How to Build a DIY Fold-Down Wall Desk for Small Spaces

What You'll Learn About Building a Space-Saving Desk
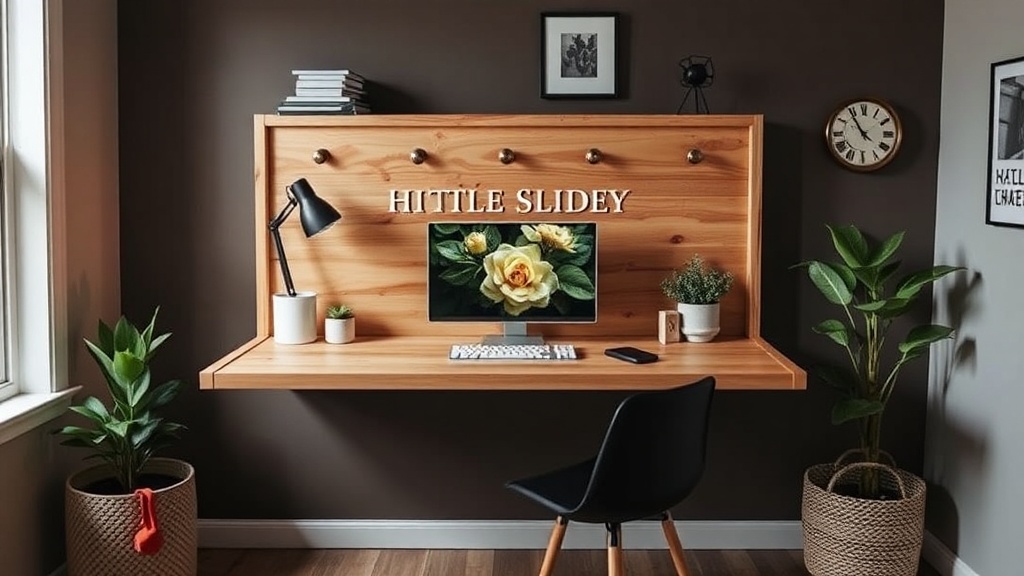
This guide covers everything needed to build a functional fold-down wall desk—sometimes called a Murphy desk or wall-mounted drop-leaf table—that folds flat against the wall when not in use. You'll get a complete materials list, step-by-step construction instructions, and tips for customizing the desk to fit apartments, studios, tiny homes, or any room where floor space comes at a premium. A wall-mounted desk can reclaim 15 to 20 square feet of usable floor area compared to a traditional desk setup. That's space for yoga, a play area, or simply breathing room in cramped quarters.
What Materials Do You Need to Build a Fold-Down Wall Desk?
You'll need lumber, plywood, hinges, and basic hardware—most available at Home Depot, Lowe's, or your local lumber yard in Fredericton. Here's the complete breakdown:
Wood and Sheet Goods
- Desktop panel: One 24" × 36" piece of 3/4" birch plywood (or oak plywood for a premium finish)
- Side supports: Two 2×4 boards, 30" long each
- Mounting cleat: One 2×4 board, 36" long
- Support legs: Two 1×3 boards, 28" long (optional—only if building a legged version)
Hardware and Fasteners
- piano hinge: One 36" continuous hinge (heavy-duty, at least 1-1/2" wide open)
- Wall-mounting hardware: Four 3/8" × 4" lag screws with washers (for securing to wall studs)
- Screws: 2" wood screws (coarse thread), 1-1/4" pocket hole screws if using a pocket jig
- Wood glue: Titebond III or similar exterior-grade adhesive
- Finishing supplies: Sandpaper (120 and 220 grit), primer, paint or stain, polyurethane
Tools Required
Nothing fancy here—a circular saw (or have the lumber yard make cuts), drill/driver, level, stud finder, and basic hand tools. A pocket hole jig like the Kreg R3 makes assembly cleaner but isn't mandatory. You'll also want clamps—at least two 12" bar clamps—to hold pieces while fastening.
Worth noting: If apartment living prevents drilling into studs, this project won't work as designed. Fold-down desks require solid anchoring to wall framing—drywall anchors won't handle the torque.
How Much Does It Cost to Build a DIY Murphy Desk?
Expect to spend $75 to $150 depending on wood choice and what tools you already own. High-grade hardwood plywood pushes costs toward the upper end, while construction-grade lumber with paint finish keeps things budget-friendly.
| Material/Component | Budget Option | Premium Option |
|---|---|---|
| Desktop (3/4" plywood) | BC-grade pine plywood ($25) | Baltic birch or oak plywood ($55) |
| Frame lumber | Standard 2×4 SPF ($8) | Poplar or oak boards ($25) |
| Hinge | Steel piano hinge, 36" ($12) | Brass or stainless hinge ($28) |
| Hardware/screws | Basic zinc-coated ($8) | Stainless or black oxide ($15) |
| Finish | Latex paint, brush-on ($15) | Hardwax oil or spray lacquer ($35) |
| Total Estimated Cost | $68–$85 | $158–$180 |
The catch? These numbers assume you own basic tools. Renting a circular saw from The Home Depot Tool Rental adds $15–$20 per day.
Where Should You Mount a Fold-Down Desk in a Small Space?
Mount the desk at standard desk height—29 to 30 inches from floor to desktop surface—and position it where the folded panel won't obstruct traffic flow or door swings. Ideal locations include hallway nooks, the back of a closet door (with modifications), or any wall segment at least 36 inches wide with adjacent space for a chair.
Before cutting any wood, tape out the footprint on your floor. Sit in a chair at that spot. Can you push back comfortably? Does the door open fully? Small spaces demand this kind of spatial rehearsal—you'll spot problems before they're permanent.
Here's the thing about wall selection: You need studs. Not just one—ideally three or four studs behind the mounting cleat for distributed load. A loaded desk (monitor, laptop, coffee mug) easily hits 50 pounds. Over time, that load cycles up and down as you fold and unfold. Solid stud anchoring isn't negotiable.
Use a quality stud finder—Zircon's StudSensor HD55 works well—and mark stud centers with painter's tape. Verify with a small finish nail if your walls have plaster or inconsistent framing.
How Do You Build the Desk Frame and Mounting Cleat?
The mounting cleat is a horizontal 2×4 that anchors to wall studs and supports the desk's entire weight. Cut your 36" 2×4 and drill pilot holes for lag screws—two holes aligned with each stud location (typically 16" on center). Counterbore these holes so screw heads sit flush or slightly recessed.
Hold the cleat against the wall at your desired height (remember: 29–30" to top of finished desktop). Use a 4-foot level—check both horizontally and by sliding it to different positions along the cleat. Small spaces amplify crookedness; a desk that looks off-level will nag at you every time you fold it down.
Drive lag screws through the cleat into studs using a socket adapter on your drill. Don't overtighten—you're compressing wood fibers, not crushing them. The cleat should feel immovable when you grab and tug.
Building the Desk Box
Most fold-down desks incorporate a shallow box—3 to 4 inches deep—that mounts to the wall and houses the folded desktop. This box gives the hinge something solid to attach to and creates storage nooks for supplies.
Cut two 30" 2×4s for the sides and one 29" 2×4 for the bottom (it fits between the sides). Assemble with wood glue and screws—pocket holes facing inward if you're using a Kreg jig, or countersunk screws from the outside if not. Check corners with a carpenter's square. Attach this box to your wall cleat using 2" screws driven from the cleat into the box's back edge.
Add a 1×2 ledge inside the box's bottom edge—this acts as a stop and support when the desk folds down. Without it, the desktop swings past horizontal and your coffee slides off.
What Type of Hinge Works Best for a Wall-Mounted Desk?
A continuous piano hinge provides the most reliable support for fold-down applications. Unlike butt hinges, which concentrate stress at two or three points, a piano hinge distributes load across the full 36" width. That means no sagging in the middle after six months of daily use.
Position the hinge so it mounts to the box's bottom edge and the desktop's underside edge—when folded up, the desktop should sit nearly flush against the wall (or against the box face if you built one). The hinge barrel faces outward; the leaves fold toward you as the desk lowers.
Pre-drill hinge screw holes with a bit slightly smaller than your screw diameter. Brass screws in particular are soft and prone to snapping if driven without pilot holes. Use #6 × 3/4" screws—eight to ten along the length provides adequate holding power.
How Do You Support the Desk When It's Down?
Three common approaches exist: hinged legs that fold out, a single center support that swings down from the desk underside, or cable/chain supports that limit the drop angle. Each suits different aesthetics and space constraints.
Hinged legs feel most traditional—two 1×3 boards, 28" long, hinged to the desktop underside with small strap hinges. They fold flat against the desktop when stowed. The downside? You need clearance for them to swing out—problematic in tight hallways.
Swing-down center support stores vertically inside the wall box and rotates down when needed. A simple 2×2 board with a bolt-through pivot at the top works fine. Add a small barrel bolt to lock it in the vertical (stored) position.
Cable or chain supports attach to the wall box sides and the desk underside corners. They limit how far the desk drops—typically 90 degrees horizontal—and carry significant load. Use 1/8" steel cable with crimped loops or decorative chain from the hardware aisle. They're invisible when the desk is down and don't require leg clearance.
For most small apartments, cable supports win. They keep the floor clear—no legs to kick or vacuum around—and installation takes twenty minutes versus the precision fitting legs demand.
Finishing and Installation Tips
Sand all surfaces to 220 grit before finishing. Plywood edges show ugly layers unless you iron on iron-on edge banding—birch veneer to match your plywood takes stain consistently and looks like solid wood.
Paint hides more sins than stain. If using construction-grade pine or SPF lumber, prime with Zinsser Bulls Eye 1-2-3, then two coats of semi-gloss latex. The sheen wipes clean and resists the coffee rings that matte finishes absorb.
Install a simple barrel latch or magnetic catch to keep the desk folded against the wall. Without it, the desktop can swing open when you bump it—or worse, when a toddler discovers it. Position the catch where it's easy to reach but won't snag clothing.
Add a small clip-on LED lamp to the desk underside—something like the IKEA HÅRTE work lamp—to avoid consuming precious desktop real estate with a base. Consider a power strip mounted to the wall box's interior with USB ports for phone charging.
Customization Ideas for Your Space
The basic design adapts easily. Build the desktop 48" wide instead of 36" for dual-monitor setups—just ensure your plywood sheet is large enough and hinge length matches. Add a shallow corkboard or whiteboard to the wall above the folded desk position for notes and inspiration.
For craft room applications, install small bins or dowel rods inside the wall box to hold scissors, tape, and markers. The desk becomes a complete workstation that stores its own supplies. In a child's bedroom, attach a paper roll holder underneath for continuous drawing surface—just ensure the mounting hardware is child-safe and pinch points are minimized.
Some builders incorporate a small mirror on the desk underside for vanity use—suddenly your desk doubles as makeup station. Others add fold-out side wings using small piano hinges, creating extra surface area that collapses when stowed.
That said, resist feature creep on your first build. Get the basic fold-down mechanism working smoothly before adding storage, lighting, or decorative elements. A simple desk that operates reliably beats a complicated one that binds or sags.
Build this desk over a weekend, and Monday morning brings a dedicated workspace that disappears by dinner time. In small-space living, that's not just convenient—it's transformative.
Steps
- 1
Gather Materials and Measure Your Space
- 2
Cut and Assemble the Desk Frame
- 3
Install Mounting Hardware and Attach Desk